Projector shutter control scripts for Qlab (Panasonic)

TL;DR:
Control a Panasonic projector’s power and shutters using Qlab (Developed using a Panasonic D6000)

The Story:
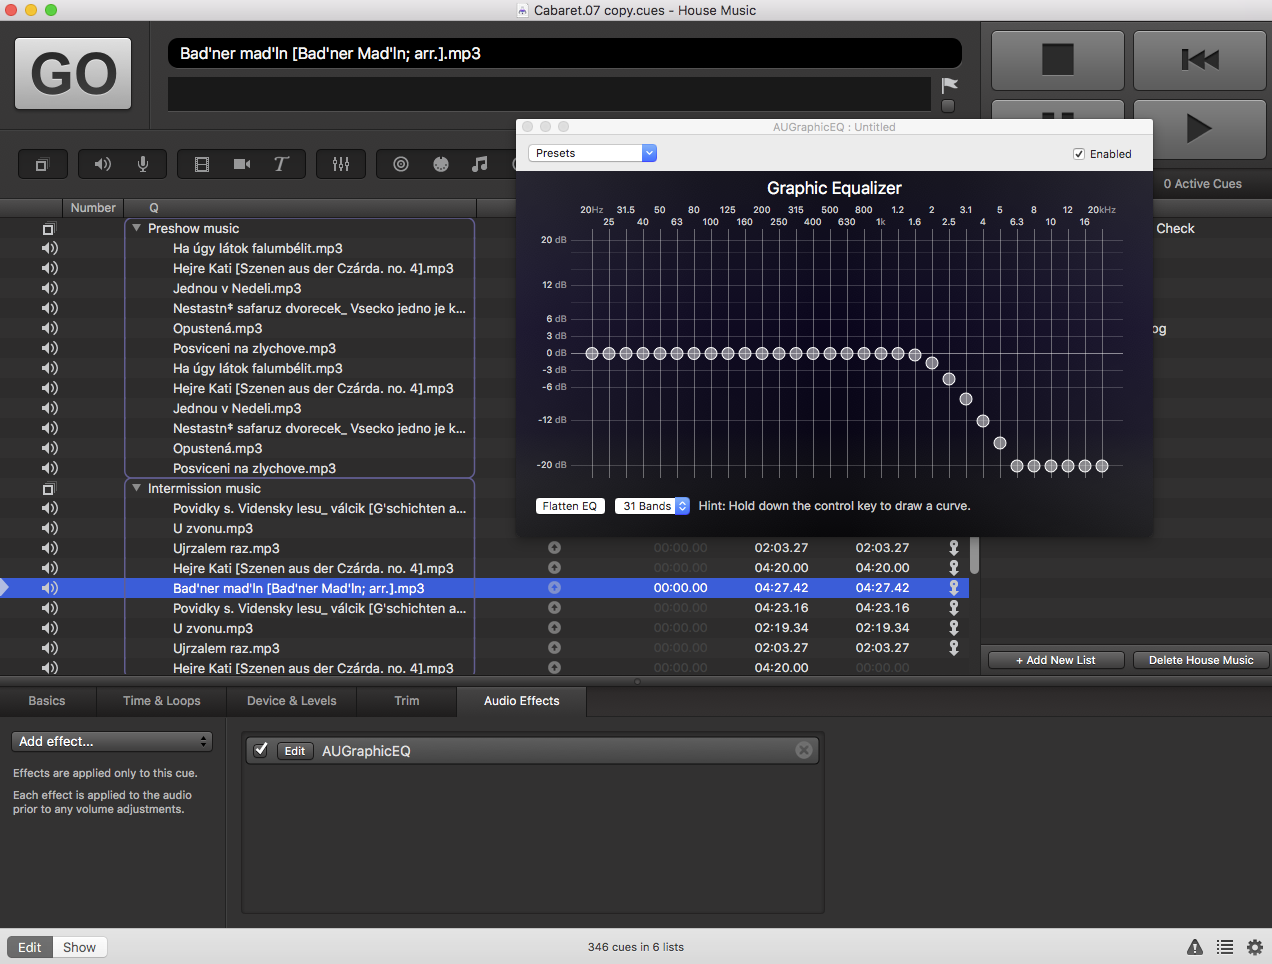
In our examples in this post, we are using a Panasonic D6000 – every brand is different and uses different controls. I’ve used this with more than one model from Panasonic. This post will probably be more of a springboard for you to research your own projector’s commands and options. In the scripting below, we are using a protocol called PJLink. Once again, I would also like to credit Mic Poolwith the majority of this scripting, as he had posted much of what I needed for the shutters and power on the Qlab Google Group

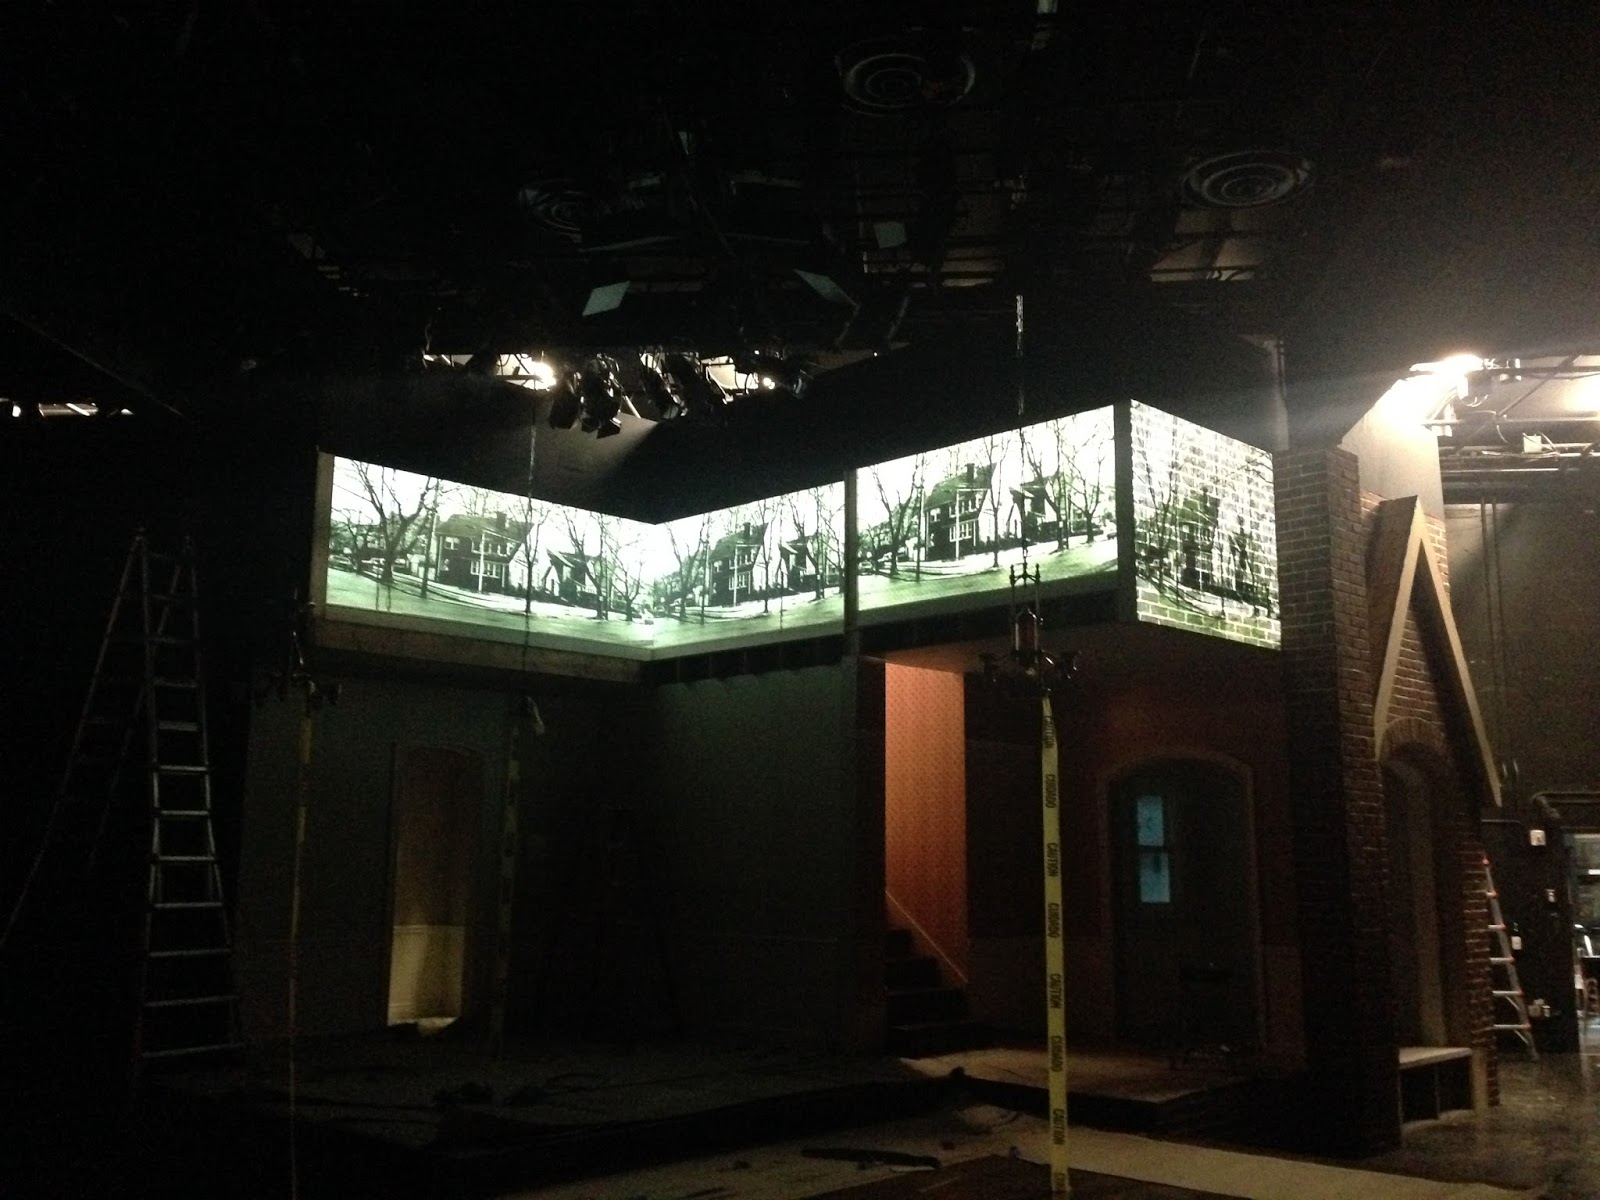
When I was video engineer on “Having Our Say,” we had four projectors mapping the set. As the tech process moved forward and the video design (completely) changed, we needed the ability to shutter the projectors. During this time, as DMX shutters were being sourced and budgeted, I learned about projector LAN controls – you know, those ethernet jacks on the side where all of the other plugs are? Turns out you can control every facet of the projector there, without having to try and aim the IR remote JUST RIGHT.

The following scripts were researched, copied and developed to help consolidate the technical process of the show. In addition to controlling the shutters, I wanted to be able to power up all of the projectors in my Qlab pre-show scripts, and then power them off at the end of the show. Here is how I did it.

NOTE: There is an inherent issue with leaving shutters closed for too long on a projector, regardless of the brand. With the shutter closed, heat will build up – sometimes very quickly – and may cause your projector to reach it’s maximum operating temperature. When that happens, it will shut down! So, in this show, while we were using the shutters, I built in cues to open the shutters during discrete times, like during Intermission, and just showed digital black. Then, before the lights started to fade, I closed the shutters so the audience wouldn’t notice them go out.

The Esoteric Bit:
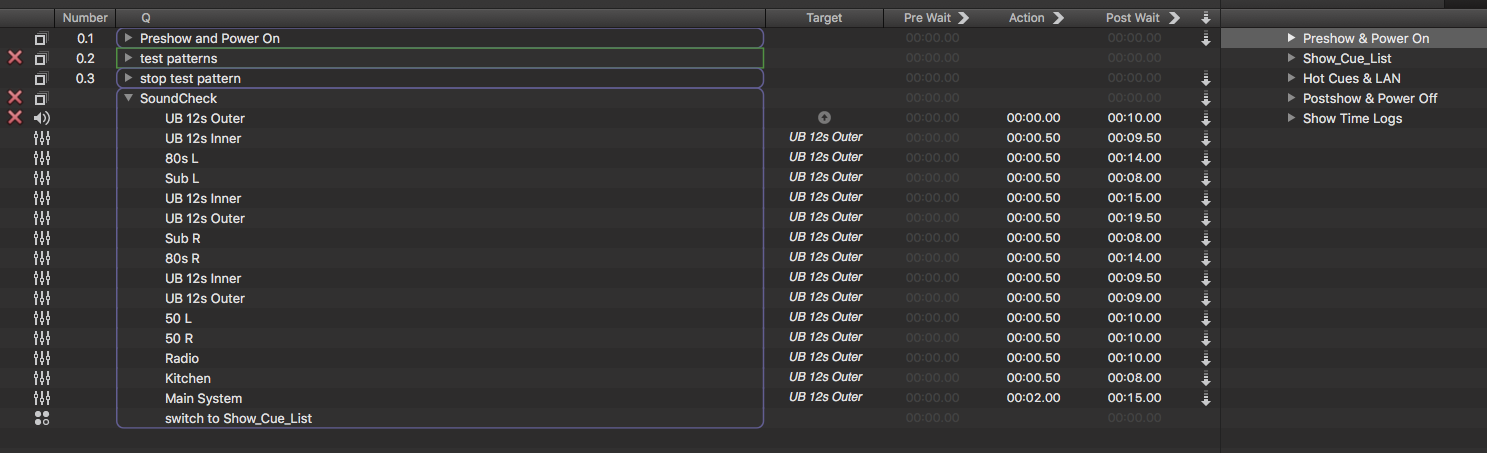
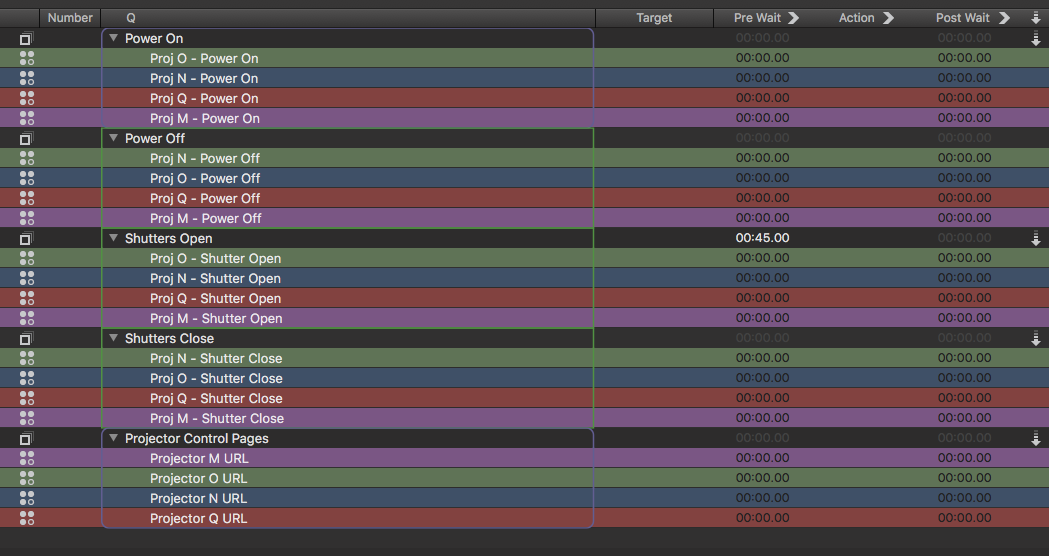
I created a number of scripts for the projectors, so that I would have individual controls available. For instance, rather than making one script to power on all of the projectors, I created four scripts, and then just grouped them together in a simultaneous group cue.

Scripts for projector control in Qlab

Projectors are like any other networked device. Once plugged into the network, they have an IP address, either assigned via DHCP from the router; or, better for live setups like this, set as a static IP address at the projector.

(Perhaps at some point I will write an article about the grinding details of IP addresses. If you don’t know what one is, it’s the device’s address on a network. For instance, the default, out of the box address for many routers is “192.168.1.1” – the address for the projector in the example below is “192.168.1.20.” All you need to know is that when setting your IP address on the projector, you will need to set it within the range that the router is operating at – in this show example, I had four or five projectors, plus a show computer, plus some other stuff and computers at tech tables. So we needed a router to tie it all together. If you are just running a network cable from your computer to one projector, you probably will not need a router. But you’ll still need to set addresses within range of each other. Yup, that will be a future article…)

On the projector, somewhere under advanced or network settings, you will be able to set the IP address. Much easier to do that on the ground, before you start rigging things! Run your network cable, power up, and open up a web browser. Type in the IP address of the given projector. (In our example here, it’s 192.168.1.20. Change this to whatever IP you are using.) When you are done, slap some console tape on the projector, with the IP address written on it. If you haven’t changed the defaults, you’ll need to log in with this information:

Username: admin1
Pasword: panasonic

(If you have changed the username and password, the scripts below are annotated so you can reflect this change.)

The resulting web page is hosted on the projector, and you will have access to ALL of the projector’s controls! No need to run back and forth with the remote control – you can make all of the adjustments from your show computer, from screen size to position and more. Here is the script I created to open up that control web page, for diagnostic and focus purposes. I ran it from QLab rather than save it as a bookmark in the browser – making it easy for the operator when I’m not there, and eliminating confusion of “which browser.” (The username and password, however, were saved in my browser.)

OPEN PROJECTOR CONTROL PAGE SCRIPT:

tell application “Safari”
open location “http://192.168.1.20
end tell

You could easily change this script to target Chrome or Firefox, etc.

Ok, so now for the scripts that actually controlled the features I wanted.

First, let’s turn the projector on and off:

POWER ON SCRIPT:

set powerOn to “/cgi-bin/power_on.cgi”

set powerOff to “/cgi-bin/power_off.cgi”

set shutterClose to “/cgi-bin/proj_ctl.cgi?key=shutter_on&lang=e&osd=on”

set shutterOpen to “/cgi-bin/proj_ctl.cgi?key=shutter_off&lang=e&osd=on”


#Do not change anything above this line!


set theServer to “192.168.1.20” — set this to the ip address of the projector

set theUsername to “admin1” — set this to the username for the projector

set thePassword to “panasonic” –set this to the password for the projector

set theCommand to powerOn –set the command required, option are, powerOn, powerOff, shutterClose, shutterOpen


#Do not change anything below this line


set theProtocol to “http” — vs https

set theUserPass to theUsername & “:” & thePassword — your Indigo remote access username/password

set theURL to theProtocol & “://” & theUserPass & “@” & theServer & theCommand

set theFinalURL to “\”” & theURL & “\””


with timeout of 1 second

do shell script “/usr/bin/curl” & ” ” & “–connect-timeout” & ” ” & “1” & ” ” & theFinalURL

end timeout

POWER OFF SCRIPT:

set powerOn to “/cgi-bin/power_on.cgi”

set powerOff to “/cgi-bin/power_off.cgi”

set shutterClose to “/cgi-bin/proj_ctl.cgi?key=shutter_on&lang=e&osd=on”

set shutterOpen to “/cgi-bin/proj_ctl.cgi?key=shutter_off&lang=e&osd=on”


#Do not change anything above this line!


set theServer to “192.168.1.20” — set this to the ip address of the projector

set theUsername to “admin1” — set this to the username for the projector

set thePassword to “panasonic” –set this to the password for the projector

set theCommand to powerOff –set the command required, option are, powerOn, powerOff, shutterClose, shutterOpen


#Do not change anything below this line


set theProtocol to “http” — vs https

set theUserPass to theUsername & “:” & thePassword — your Indigo remote access username/password

set theURL to theProtocol & “://” & theUserPass & “@” & theServer & theCommand

set theFinalURL to “\”” & theURL & “\””


with timeout of 1 second

do shell script “/usr/bin/curl” & ” ” & “–connect-timeout” & ” ” & “1” & ” ” & theFinalURL

end timeout

Now that we have control over the power, let’s start using those shutters!

SHUTTER OPEN SCRIPT:

set powerOn to “/cgi-bin/power_on.cgi”

set powerOff to “/cgi-bin/power_off.cgi”

set shutterClose to “/cgi-bin/proj_ctl.cgi?key=shutter_on&lang=e&osd=on”

set shutterOpen to “/cgi-bin/proj_ctl.cgi?key=shutter_off&lang=e&osd=on”


#Do not change anything above this line!


set theServer to “192.168.1.20” — set this to the ip address of the projector

set theUsername to “admin1” — set this to the username for the projector

set thePassword to “panasonic” –set this to the password for the projector

set theCommand to shutterOpen –set the command required, option are, powerOn, powerOff, shutterClose, shutterOpen


#Do not change anything below this line


set theProtocol to “http” — vs https

set theUserPass to theUsername & “:” & thePassword — your Indigo remote access username/password

set theURL to theProtocol & “://” & theUserPass & “@” & theServer & theCommand

set theFinalURL to “\”” & theURL & “\””


with timeout of 1 second

do shell script “/usr/bin/curl” & ” ” & “–connect-timeout” & ” ” & “1” & ” ” & theFinalURL

end timeout


SHUTTER CLOSE SCRIPT:

set powerOn to “/cgi-bin/power_on.cgi”

set powerOff to “/cgi-bin/power_off.cgi”

set shutterClose to “/cgi-bin/proj_ctl.cgi?key=shutter_on&lang=e&osd=on”

set shutterOpen to “/cgi-bin/proj_ctl.cgi?key=shutter_off&lang=e&osd=on”


#Do not change anything above this line!


set theServer to “192.168.1.20” — set this to the ip address of the projector

set theUsername to “admin1” — set this to the username for the projector

set thePassword to “panasonic” –set this to the password for the projector

set theCommand to shutterClose –set the command required, option are, powerOn, powerOff, shutterClose, shutterOpen


#Do not change anything below this line


set theProtocol to “http” — vs https

set theUserPass to theUsername & “:” & thePassword — your Indigo remote access username/password

set theURL to theProtocol & “://” & theUserPass & “@” & theServer & theCommand

set theFinalURL to “\”” & theURL & “\””


with timeout of 1 second

do shell script “/usr/bin/curl” & ” ” & “–connect-timeout” & ” ” & “1” & ” ” & theFinalURL

end timeout

One of the other problems with this show was that we were getting unexplained HDCP errors (high definition copy protection – the protocol that is supposed to stop you from plugging a computer’s digital video out into unapproved devices, preventing you from duplicating the content or starting up an illegal movie theatre). So, at random points, we would have a projector suddenly turn to snow! Definitely traumatic for the delicate performance.

To hide this, as well as have some manual control during the tech process, I added a hotkey to the shutter close scripts using the numbers 1-4, and labeled the keyboard. That way we could slam the shutters closed in event of an error, though we could have also done this on the lighting console, using either macro buttons or turning submaster bump buttons into hotkeys.

Cheers!
-brian

A Brush-up on Basics – some helpful posts on Qlab and workflow

I work with a lot of students, across a few schools. I count myself lucky to be able to share with them what I know – as well as learn a lot from them. Many have become just “younger peers” because I like to work collaboratively, even if I am driving the design.

Last month I reshared a bunch of past articles that I felt my new students would get the most out of, and serve as a refresh for some returning folks. Here they are all in one place, for reference sake, as I start getting into production mode for my fall shows (my primary one being Little Shop of Horrors at NVCC).

While I continue to talk a lot about Qlab on this blog, it’s just as important to keep up on best practices for working in general – which I have found to keep me sane in any project, not just live show production.

Cheers!
-brian

Automatically Switching Cue Lists in Qlab

TL;DR:
Tell Qlab to automatically switch to another Cue List so that you’re ready to go – like jumping from Act 1 to Act 2, or out of your Preshow routine. No clicks needed, and make life easier for your board op.

The Story:
My goal with this blog is to help as many designers and engineers as I can – as well as use it as a training tool for my students. However, with posts like this, it also serves as a repository for things I forget how to do and need my own reference material!

I copied this largely from some forum or another, before I made some adjustments. Maybe the Qlab Google Forum. I don’t know. If this is your work, please let me know and I will credit it. Because I have totally forgotten that I had this working properly at one point, and five minutes ago stumbled on this script while researching something else in my archives. (It was two years ago, and my attempts to recreate it since then have been half-hearted failures.)

During production of “Having Our Say,” a revival that was put up by Long Wharf Theatre here in CT (and then passed on to their production partner, Hartford Stage, for a couple more weeks), I, as video engineer, worked closely with my then-new-friend Adam Bintz, who was the sound engineer/supervisor for LWT. Our two departments were combining our Qlab shows together, and our goal was to make it all as seemless for Adam as possible, so he could focus on mixing, not taking cues. This led to triggers from lighting, and so on.

“Having Our Say” tech rehearsal

One of the things I worked on for this show was this script – the ability to jump from one Cue List to another. The thought process is to save clicks for your operator. Top of the show, he could start the soundcheck Cue List, and when it was done, Qlab would automatically go to the Show Cue Cue List (script is at the bottom of the screenshot).

The script we are creating is at the bottom of this Cue List example

I find this type of script useful to put at the end of Act One, and automatically go to Act Two, so that when the operator returns from their break, Qlab is ready to go. They don’t have to manually click on the Cue List – or display the list of Cue Lists, if it is hidden.

Will it change the world of theatre? No. But it is a nice service I like to do for my operators or for myself, especially on shows where there is a lot to do and relieving mental overhead is useful.

The Esoteric Bit:

There is a bit of math going on in this script, but implementing it is as simple as copy and paste into a new script cue, and setting group cues/autocontinues/autofollows in a way that the script cue is fired.

Create a new script cue, label it something obvious like I did “Switch to Show_Cue_List”. Paste in the following:

tell application “QLab”
    tell front workspace
        set cueLists to every cue list
        set currentList to current cue list
    end tell
end tell
set listPosition to getPosition(currentList, cueLists)
set totalLists to count cueLists
–Select Next Cue List
if (listPosition < totalLists) then
    gotoList(cueLists, listPosition, 1)
end if
–End Select Next Cue List
on gotoList(l, p, i)
    tell application “QLab”
        tell front workspace
            set newList to item (p + i) of l
            set current cue list to newList
        end tell
    end tell
end gotoList
on getPosition(i, l)
    repeat with n from 1 to (count l)
        if l’s item n is i then return n
    end repeat
end getPosition

It should then look like this, after you hit “Compile Script”:

The compiled Applescript

You will notice that the screenshot example says “QLab 3.” I have been working in Qlab since version 2, and have kept multiple versions on my computer at any given time, for compatibility and testing purposes. So to keep them straight, as well as to have more than one program in my Applications folder called “Qlab,” I renamed them with a version number. So my script was invoking the proper on on the computer at that time.

The important thing to realize about this script is that it will jump you out of your existing Cue List (view-only, media will continue to play!) and into whatever Cue List is after it. If you want to make Qlab go BACK to a previous Cue List, you would have to replace the section marked “Select Next Cue List” with this:

–Select Prev Cue List
if (listPosition is not equal to 1) then
gotoList(cueLists, listPosition, -1)
end if
–End Select Prev Cue List

This will then make Qlab go back one Cue List, to whatever is there. I have played around with creating a script that lands you in a SPECIFIC Cue List, but I haven’t gotten that working. So for now, just step sequentially through your lists!

Cheers!
-brian

Actually using that digital script/prompt book

TL;DR:
Use the PDF version of your script/prompt book while running your live show.

The Story:
Last week’s blog post has already covered creating digital prompt books in detail – here I am going to show how I have worked those PDFs into my live show workflow.

For following your prompt book during the show, you can, of course, view it on an iPad. However, since almost everything I do is Qlab-focused, I already have a computer in place. So we’re going to run Qlab and Preview on the same computer to do our show. I’ve been developing this workflow for a while, and interview my board ops after closings to get their feedback and notes on how I did. My operator(s) at FoH are able follow along, and augment my cues and notes with no issue, and the show ran great.

A word about monitors – In this situation, it is imperative to have two. One just for Qlab, and another for your prompt book. You’ll need the space to view everything you need to see. Indeed, for a recent show at the college, I had three – an iMac with the external monitor output into a VGA splitter, so both of my FoH desk crew (mixing and playback) could each see the PDF at their end of the work area. The playback operator controlled the page turning. It sounds like a lot of extra gear, until you realize that after setting up a big mixing desk, a rack of wireless receivers and hearing assist, two outboard racks, two snakes, networking gear/video runs and a computer…an extra monitor or two at FoH isn’t going to break you. 🙂

The Esoteric Bit:
For the rest of this post, I will refer to the PDF in Preview as a prompt book or a PDF, and “script” will refer to executable AppleScripts.

Qlab is our primary application during the course of a live show. At all times, the operator needs to be able to hit “Go.” But we also need to be able to follow along in our prompt book.

There is an immediate problem – if you click on Preview to turn the page, Qlab no longer has focus (the application title bar goes grey and is no longer in front), and if you don’t click back on Qlab, it will ignore your spacebar telling it “Go.” That is a lot of clicking and room for error. And if you’re using a second monitor like I do, that’s a lot of real estate to mouse across.

At one point, I experimented with Qlab having focus, hovering the mouse over my PDF, and using the scroll wheel to advance the script. Well, that’s better than all the clicking, but mice have a way of moving on you. And if you’re using one of those terrible Apple mice with the nipple scroll wheel…you’re bound to be SOL. Regardless, this is specialty knowledge and too high a chance for failure. We don’t want to think about this.

What we are going to do is create Hotkeys in Qlab that will turn the page for us, and restore focus to Qlab – so we never miss a cue! To start, I always create a separate cue list with any and all Hotkeys, so they are all in one place.

Qlab screenshot

Let’s create a group cue (stay organized!) and put three script cues in it, as shown:

Qlab screenshot

As I may have mentioned elsewhere, I like to number my cues that are HotKeys with a reminder of what that keystroke is. Easier to keep straight, since I might have as many as 6-8 Hotkeys for a show (or more!). Which reminds me, I really want to get a cheap MIDI controller for myself…

Here is the breakdown of what will be happening here:

  1. The first script will open the PDF of our prompt book, put it into 2-page view (convenient way to view the book), open it to the starting page, and restore focus to Qlab.
  2. Second script will send a command to Preview to turn ahead one page, and then restore focus to Qlab so as to be ready for the next cue.
  3. The last script does the same as the previous, except it goes back a page.

Here is the Applescript for opening the PDF. I’ve used a show I designed, Godspell, as an example (There were about 1100 cues in that show… O_o Thank goodness for cascading autofollows!). This is a long script with a few chunks:

–open preview
tell application “Preview”
activate
open “Users:brian262:Design:NVCC:Godspell:Godspell_script.pdf” as alias –choose file path
end tell


–two-up page view
tell application “Preview”
activate
tell application “System Events” to keystroke “3” using command down
end tell


–open to particular page
tell application “Preview”
activate
tell application “System Events” to keystroke “g” using {command down, option down} –go to page command
delay 1
tell application “System Events” to keystroke “11” –page number
delay 1
tell application “System Events” to key code 36 –Keycode 36 triggers Enter
end tell


–restore focus to Qlab
tell application “QLab”
activate
end tell

What’s going on here?

The first part opens the application Preview, which is the native PDF viewer in macOS. It then opens a file, which will be our prompt book PDF. You’ll have to edit the file path carefully to make sure the script finds its target: The “open as alias” is an important part. I don’t recall why, but you aren’t actually creating an alias to the file in OSX (aka “shortcut” in Windows parlance).

Next, we set up Preview to display the PDF a certain way. If you recall from previous posts here on the blog, System Events is a feature of macOS that allows you to specify the input of any key on the keyboard. So this part of the script is using the Command key (in the “pressed down” position) along with the number 3. I like opening the PDF in two-page view, as it makes it most like a real paper book. “Command 3” is the shortcut in Preview to do this, much like “Command S” is to save.

NOTE: One alternative to this is to change the value “3” to “2”, which sets the view to one-page only. Then, for your second monitor that displays your PDF, turn it 90 degrees, to match a single page’s orientation!

Moving on, the next part of the Applescript will use the shortcut keys in Preview to open the “go to page” dialog, then enter a number – the page that you want to start your show on – and then press Enter. (You will also have to edit in what page number your first cue is on, so it opens where you want it.) Delays are put into the script, because otherwise the subsequent commands would come to Preview too fast and would be ignored.

Lastly, we restore focus to Qlab, so that it’s ready for us to do something, like start the show!

Let’s move on to the page-ahead script:

tell application “Preview”
activate
tell application “System Events” to key code 124 –Key code 124 triggers right arrow
end tell
tell application “QLab”
activate
end tell

Note that the end of this script passes focus back to Qlab, so we can keep hitting the spacebar for our next cues.

Now, let’s click on the Basic tab and assign a Hotkey. I use the period in this cue.

Qlab screenshot

I selected this key as my Hotkey because it’s the same one as “>” – that looks like a forward arrow, doesn’t it?

Our last script is basically the same to page back:

tell application “Preview”
activate
tell application “System Events” to key code 123 –Key code 123 triggers left arrow
end tell
tell application “QLab 3”
activate
end tell

Again to the Basic tab, and assign a trigger – I used the comma, so I can use the “<” as my back arrow.

When the PDF opens, you’ll have to drag it over to your second monitor, unless your computer remembered your window positions. You should now be all set. Run your cue playbacks in Qlab, and turn your pages with one button press!

Cheers!
-brian

Digital play scripts/prompt books are here!

TL;DR:
Ditch paper scripts/prompt books for computer copies. Never lose or forget your script again, and guess what – it’s BACKLIT!

The Story:
I design in a lot of different theatres, often with overlapping schedules. This is a common designer dilemma.  There was one time I had six shows opening within a six week window! Granted, not all of them were huge, but that’s a pile of scripts to have to carry around so you always have the right one!

Obviously, I like technology, and this was a perfect reason to use PDF versions of my scripts. I also need to be able to share my scripts with my operators, and paper isn’t very good at the whole “remote” thing.

I love reading and working on my iPad, and use iAnnotate a lot. However, making edits to those notations anywhere other than on that iPad is impossible. So, while I may do my initial read-through and note taking in iAnnotate on my iPad while resting out on my hammock, I make my show prompt book using Preview in OSX. That’s right – I’m not even bothering with Acrobat.

The notes are easy to make – there is a text tool, along with the ability to draw lines, and you can color code everything you notate.

Early in my development of this workflow, I was on a show that found me a little behind in marking up my book. It was a musical, and I wanted to mark actor entrances and exits (in a new color) for live mixing notes. I had already used PDF scripts on another show, and gotten their feedback on the experience…but they only had limited changes to make. This was going to be a lot more work.

I’m glad to report that this most recent show worked out perfectly. I had two college students working the (analog) FoH desk – one for playback, assisting, and comm, and the other was just mixing. The mixing engineer had enough wiggle room to make all of the notations for entrances and exits during rehearsal, as well as touching up the playback cues. It worked perfectly, and I was able to view their work after each rehearsal and make my own notes.

In the end, I will admit that this method does take a little longer than scribbling in a book. However, I feel that the advantages greatly outweigh the benefits:

  1. As a designer, I can present engineers and techs with a fully-marked book at tech, and make additional edits as needed.
  2. The script is backed up and can’t be lost or destroyed, when combined with my use of Google Drive (see my post on how I use this).
  3. It’s backlit! No longer do you need a light trained on your script – you can read it at any time.
  4. You probably already have a computer at your station anyway. Combined with a second monitor and triggers in QLab (see next week’s post), it’s even easier to turn pages using this solution and always see where you are!
  5. Easily color code cues, just like you would with highlighters in the paper version.
  6. No leftover marks from pens or pencils that won’t quite erase.

The Esoteric Bit:
I’m already a Qlab user and a Mac fanatic, so you know I’m doing all of this on a Mac. For my purposes, I prefer the PDF/image viewing application that comes with macOS – “Preview” – over Adobe Acrobat. (I actually haven’t installed Acrobat in…5 years? 8 years? Having worked a long time in art and publishing, I definitely use PDF files and edit them a lot, but haven’t needed Adobe Acrobat really since leaving the industry.)

Preview has changed a little bit across the different versions of macOS. So, depending on the cat/mountain range that your Mac is running, you may have some very slight differences.

The first challenge is getting my play script as a PDF. I have found that sometimes, depending on the show, I can get a copy of the script online (legal or otherwise). However, I have found that it is best to work off of the same book as your stage manager is using, so that when the director calls to a certain page, you can follow along easily. It cuts down on the number of questions in tech rehearsal – variations on “where are we?”

A lot of productions these days have the script already in PDF, either as part of their licensing package or whatever. At my main school, if we don’t have the script in PDF we just run it through a big standalone copy/scanner which puts it into PDF.

(As for the legality of this, I honestly don’t know – but I see it as “fair use” much like ripping a CD to make MP3s. I am not redistributing the material, I’m just putting it into a format I can use.)

End result – it doesn’t matter if the PDF pages are made up of text or images (scans). I’m marking it up using the text tool in the left margin, and the line tool to draw horizontally to the cue word in question. Just like people have worked on paper for decades of modern theatre.

Depending on what version of Preview/MacOS you are using, the screenshots may differ, but all of the functions are the same. (The examples here are from MacOS v10.12.)

——————–

First off, turn on your toolbar, usually found under the toolbox icon up top. (Older versions of Preview have this button on the bottom, if I recall.)

Preview – show markup toolbar

The tools I usually use are the line drawing tool and the text box:

Preview – toolbar

Any notation can be dragged all over the page, if there is a change. Here are two sample pages from “Cabaret:”

Cabaret script – markup

There are some rules/guidelines that I follow:

  1. Use the same font and weight for everything. Use the same color, or keep consistent with color choices. If you make a choice in font size before you make a notation, that formatting becomes your default.
  2. I use a strong color for all of my notations, so it stands out from the text of the script. (I always use the default red.)
  3. If I am marking a script for live mixing and I want to notate character entrances, I’ll notate their names in a new color, to keep it separate from my GO cues. I think I have grown to liking those notations on the right side of the page, also as a way of separation, as well as to avoid overlaps with numbered cues.
  4. I keep marking all of my cues on the left side of the script, since I don’t have a gutter to worry about, like I would in a physical book.
  5. Depending on the layout of the script and/or the scan, if the margin I am marking up in is messy or otherwise I need my text notations to stand out, I will ensure that my text notations have a white background, which makes it easier to read.
  6. As with a regular paper script, I draw a straight underline from the cue word to the cue in the margin.

Here are a few known issues to be aware of:

  1. As with any work done on a computer, SAVE OFTEN!
  2. This may be obvious, but you can’t have two people editing the same document at the same time, even if you’re syncing with Google. Similarly, if it’s tech and I want to make edits from home, I have to make sure that the script is closed on the show machine, if it’s online and actively syncing.
  3. If you start making notations, save, and then open the PDF in a newer version of Preview/macOS, often times you will get a frame around your text, like this:
Preview box error

I don’t know why this error happens, it’s kind of annoying. It’s easy enough to remove, but it has to be done to each individual text notation. It isn’t a game-ender, but it is an area for improvement. If it happens to me, I often just ignore it, leave the new boxes, and curse quietly under my breath. The show moves on.

Overall, while this does take a little bit more time scribbling with a pencil, it really allows me to make changes much neater; if I were marking up my script with a ruler and being neat, it takes about the same amount of time. Due to the fact that I am working on this often off-site, it really has saved me a lot of time and headache – the board op can get working/set up before I could arrive at the theatre with a paper copy. Save and sync from my home office!

Cheers!
-brian

Cue numbering, and playing well with others

TL;DR:
How to write cue numbers with a system that lets you skip around, know where you are in your cue sheet, and be compatible with other departments…by working in blocks of ten.

The Story:
Some seasons are completely insane for me. It’s a common theme for designers – you’ve got maybe one too many shows on your plate, because something ran late or an opportunity came along that you had to take. Like any freelance-based business, you have to be organized and able to juggle multiple priorities and deadlines.

Two important elements to my workflow came early on. One is the use of digital scripts/prompt books, which I swear I will get to in another post. But the other crucial part for me is how I number my cues.

This may seem like a trifle – but it has allowed me to submit my cue sheet to the stage manager before tech begins, and gives me lots of room for error and the changes that can happen over the course of tech.

In this example, we are going to use a theatre production as an example. But I have used this for concerts and corporate events as well. I’m going to speak from the standpoint of sound, but it of course works for any department.

The Esoteric Bit:
The first thing to decide is what range your cues are going to be called. Maybe the lighting designer usually just starts with Cue 1 – pretty straightforward, right?

For sound cues, many companies/groups relegate sound cues to letters – A-Z, and some permutions if that isn’t enough or the design calls for a new cue between E and F – whether that’s E.5 or EE, whatever.

I hate that. I want all of the numerical freedom, and I can design fairly cue-heavy shows, especially if I am designing video as well. Plus, I want something that makes sense and is clear over the comm – no “T, as in train” or having to count how many times the stage manager said a letter to know what cue it is.

So in this example, I’m going to start with 300 – putting myself way above lighting, because the last thing you want is the stage manager to have to call more than one “Cue 22.”

My first cue is always 0.1 – or in this case, 299.1 (not shown in the example below). It’s the prep & setup cue & scripts before the doors even open.

I then work in blocks of ten. Here is how it goes:

300-309 – preshow, curtain, etc
310-319 – Act 1, scene 1
320-329 – Act 1, scene 2
330-339 – Act 1, scene 3

And so on. At the end of the Act 1, I jump up to the next block of 100  for Act 2. So Act 2 looks like this:

400-409 – intermission, curtain, etc
410-419 – Act 2, scene 1
420-429 – Act 2, scene 2
430-439 – Act 2, scene 3

If Act 1 has enough scenes to hit the 400s, then I’d jump to 500. Simple.

My cue sheet quickly starts to look like this:

Hearts Like Fists – sound cue sheet, as submitted to the Stage Manager.

I have a couple of rules that keep this flowing:

xx0 cues = top of the scene/fade in
xx9 cues = end of the scene/fade out

Look at the cue sheet. Notice that at any given time, I can look at a cue number and know where in the show it is. Act 1, Scene 6 is always going to be in the (3)60s. Similarly, if I am designing on the fly – on paper or in the space – I know that if we are in Act 1, Scene 4, I should start at (3)40, so that I leave myself room for other parts of the show I haven’t designed yet.

This process allows you a lot of flexibility and room. Needing more than ten cues isn’t a problem, because every lighting system, etc allows for decilmal points. Older systems may only allow for tenths – 46.8, not 46.84, for example – but I rarely have any problems. (It would become a mouthful to call, too – be kind to your stage manager!) Yes, there are shows with unbalanced scene lengths or directors may edit the show and keep you from being numberically perfect – but that is the exception.

5 years and COUNTLESS shows later, I can attest to this system. My stage managers also find it easy to work, with because it is so predictable, and they can get my cue sheet early, even if I haven’t finished my design. And, because I work with Google Drive and use the native spreadsheet application, I share the cue sheet with them, giving them live updates, should I make a change.

Cheers!
-brian

September is Cue and Script Month on the Rocktzar blog!

This month, we are going to post around the theme of cues and scripts – numbering systems, digital scripts/prompt books, Applescripts for Qlab that will turn the pages of those scripts, and more.

Here are the topics we will be looking at:

Through these posts, I’ll be sharing some of the techniques that I have used that allow me to design and manage on multiple shows at a time. The posts I’ve been writing really document how I’ve been able to be in multiple productions, which has also enabled me to hand off tasks and projects to other people, zero in on the assistance that I need, and have a show up and running for tech.

While not all of these posts are Qlab-related, they all add together and will culminate in how you run your show in the Qlab environment. I hope you’ll find this as useful as I have!

Cheers!
-brian

Using Qlab to control Spotify and house music

TL;DR:
If you’re using Spotify for house music, here is how to control it using Qlab. Especially helpful for random little shows & presentations.

The Story:
Spotify has become a dominant player in how we discover and consume music.  With almost 150 million active users and almost 20% of Americans using it every month, it’s the service that more and more people turn to for music listening.

As such, more and more creative people who come up with audio mood boards/playlists and house music are using it. And sometimes those playlists are requested to be used during productions. Not your big professional shows, mind you – I can’t imagine any Broadway designer or FoH tour guy streaming their house music every night. But there is a huge section of the entertainment industry below that level, where someone like the director might say “here is my playlist, use this for the show.”

This of course breaks a few standard practices, particularly the idea of keeping your computer offline during the show and having all of your content local. But, in the real world, where budgets and time can be limited and the resulting productions are a bit more of a collaborative affair than the silo-ed departmental approach, you might need to use Spotify to play back some music in the house while the audience is waiting for the show to begin. Here is how you can control Spotify using Qlab, so that you can keep working in a singular interface for your show playback and sync with the rest of your cues. The last thing you want to do is have to toggle between different applications.

There is a case, however, where I might choose to use Spotify as my preshow music. Plenty of times I am running small, one-off shows and presentations, and having music in the room before the event starts is needed. I may not have my library with me, or even be on my own computer. In this scenario, I might call up a playlist appropriate for the event and run that. It’s not about designing an experience as much as just setting the atmosphere a little.

NOTE #1: As mentioned in an earlier post, this does not cover licensing of music used in public performance. I probably should get around to covering that soon.

NOTE #2: The Spotify application can sometimes be a bit system intensive. I will address how to optimize its performance.

The Esoteric Bit:
You will need the following applications:

  • Qlab, with at least a Pro License – either purchased or a daily rental. (See my post on licenses here: https://www.rocktzar.com/qlab-licensing-costs-means/)
  • Spotify, the standalone application. My scripts will not work with the web browser version. It is available for free at www.spotify.com.
  • A paid Spotify account. You can use a free account for testing, but without a paid account, you’re going to get ads through your PA system!

We will create a few cues as we step through the production:

  1. Launching Spotify so that it is ready and waiting.
  2. Telling it to Play the currently paused track (for those random pickup gigs that aren’t designed)
  3. Telling it to Play a particular playlist
  4. Fading out the music, and Pausing at the end of the Fade
  5. Restoring music and skipping to the next track
  6. Quitting Spotify at the end of our show.
Qlab list of scripts for Spotify

Let’s start with Step One. Start up Qlab, and create a script cue in your preset, which is your list of cues you run before the house opens to prep for the show. (If you don’t already do this, you should check out our script on presetting your computer level – https://www.rocktzar.com/setting-computer-system-volume/)

1) Open Spotify

tell application “Spotify”
    activate
end tell
–restore focus to Qlab
tell application “QLab”
    activate
end tell

Click “Compile Script” at the bottom of the screen. You will end up with this:

Qlab Spotify open script

The “restore focus” part keeps Qlab front-and-center, so that if you hit spacebar to GO, it will work as expected.

2) Play Spotify (Plays current track)
Create a new script cue where you want the music to start playing. Paste in the following code:

tell application “Spotify”

set sound volume to 100

play

end tell

Qlab Spotify Play script

This will tell Spotify to play whatever you were just listening to. Again, this is great for when you just need to play music quickly, and have auditioned a playlist or an album that works well enough for the event on hand. But, if you want to play a particular playlist, regardless of what you might have recently played, here is the script cue for that:

3) Play Spotify Playlist

tell application “Spotify”

set sound volume to 100

set houseTrack to “spotify:user:talkingtobrian:playlist:5mJhD1y4EvEyJp9LzOSOaq”

play track houseTrack

end tell

Qlab Spotify plays a particular playlist

This one looks pretty weird! That long list of jibberish is the Playlist ID within Spotify. Every song, album, and playlist has a URI – a “unique resource identifier.” So this script can target, in theory, any of those things. (Please don’t use this as a way to play all of your show’s songs using Spotify – even if you use the API hooks to begin playing at a particular second, the lag is gonna kill your timing. RESIST!)

Anyway, how do we get this ID number thingy? Right click on the playlist and choose “Share > Copy Spotify URI”. Paste into your script, between quotes, and you get that entire string “spotify:user:…”

Spotify Share menu

4) Fade and pause Spotify music
This script will fade out the volume of the Spotify player, and then pause the song playing at the end. It will then reset the volume back to 100.

property tick : 5 — change volume level by this many each loop

property thismany : 0.25 — seconds to wait before making next change to volume

tell application “Spotify”

repeat

set snd to sound volume

if snd is less than or equal to tick then

set sound volume to 0

exit repeat

end if

set sound volume to (snd – tick)

delay thismany

end repeat

pause

set sound volume to 100

end tell

Qlab – fade and pause Spotify

5) Resume Spotify music, restore volume

tell application “Spotify”

set sound volume to 100

play (next track)

end tell

Qlab – resume Spotify, restore volume

This might seem redundant, resetting the volume in more than one place. However, I feel that during tech, with all of the jumping around that can happen, I would rather reset the volume like this each time just to make sure that things are working when I want them to. (However, if you change the value from 100, make sure you do it everywhere else as well!)

6) Quit Spotify

tell application “Spotify”

quit

end tell

Qlab – quit Spotify

Use this script at the end of your show to clean up your computer.

Now, the last thing I want to cover is a little trick to use if your Spotify application is sluggish, even after you’ve tried uninstalling the application (and trashed all of the preference files, etc…a FULL uninstall). The program can get really bogged down if you have a LOT of playlists. I was able to get a lot of performance back at one point when I was faced with hundreds of playlists every time the program opened. I created a New Playlist Folder (under the File menu) and put EVERYTHING into that. It eliminated the application’s need to cache everything on load, or seemed to. Kind of like how your computer slows down if you have dozens of files on your desktop – putting everything into a folder will remove the computer’s need to cache those items.

If I am not mistaken, this trick also helped regain some speed in the mobile app for this user as well. So, something to try if you have a lot of playlists and getting a performance hit.

Cheers!
-brian

Using Qlab to control iTunes and house music

TL;DR:
If you are using iTunes to play your house music, here is how to control it using Qlab.

The Story:
Ah, iTunes. That old workhorse of a music player that has bloated with responsibility for all kinds of media and syncing. Consumer music listening habits may have moved on from local libraries, but iTunes is still hanging in there. It also works like Spotify, with the ability to stream music on demand. Like with Spotify, the idea of streaming music during your show sounds like a bad idea waiting to crash.

But whether you are streaming or working with local files, I’d like to share some scripting that allows you to control your music playback from within Qlab, where the rest of your show lives. You don’t have to switch between applications or pull a manual fade on the board to switch over from house music and start the show.

I will add this – there are plenty of times where you are working on a less formal event, and need to put up some house music quickly just to kill dead air while the audience files in. In this scenario, I have definitely used streaming music or long YouTube videos for house music (though YouTube inserts more and more ads, so this is no longer a safe option.) These scripts will definitely help you in those situations.

NOTE: I have found that this script’s method of fading, as written, is not always as smooth as what you would find in a regular Qlab audio cue fade.

The Esoteric Bit:
In the examples here, I will assume the use of a local playlist, with MP3s on your hard drive. But the API hooks are all the same for iTunes, you’re just telling it to play and pause.

In iTunes, create a playlist that you want to use.

In Qlab, we are going to set up a series of scripts:

  1. Opening the application (during your show preset)
  2. Start playing a specific playlist
  3. Fade out and pause the track
  4. Restore volume and start playing the next track
  5. Quit the application (show cleanup)

So create a new script cue for each of these, and enter the following AppleScripts:

1) Open iTunes

tell application “iTunes”
    activate
end tell
–restore focus to Qlab
tell application “QLab”
    activate
end tell

The “restore focus” part keeps Qlab front-and-center, so that if you hit spacebar to GO, it will work as expected.

2) Play Playlist

tell application “iTunes”
    set sound volume to 100
    play playlist “NAME OF PLAYLIST”
end tell

3) Fade out and Pause

property tick : 5 — change volume level by this many each loop
property thismany : 0.25 — seconds to wait before making next change to volume
tell application “iTunes”
    repeat
        set snd to sound volume
        if snd is less than or equal to tick then
            set sound volume to 0
            exit repeat
        end if
        set sound volume to (snd – tick)
        delay thismany
    end repeat
    pause
    set sound volume to 100
end tell

4) Restore Music (and start playing the next track)

tell application “iTunes”
    set sound volume to 100
    play (next track)
end tell

If you don’t want to skip to the next track, omit “(next track).”

5) Quit iTunes (cleaning up your show)

Instead of tabbing through my applications that I might be using at the end of the show, I prefer to use Qlab to shut them down as part of my last cue.

tell application “iTunes”
    quit
end tell

Put these cues into your show where ever you need them. Simple as that. Now you don’t have to focus on multiple applications.

NOTE: Eagle-eyed readers will notice that I restore the volume TWICE in these scripts. I do that because, in my experience, the amount of jumping around that happens in production can leave you skipping cues as you work on parts, and you can end up with iTunes at minimum volume at the wrong time. I also had planned to write a “fade in” script but never put enough time into it – so the extra restoring of volume was also a part of that possible move.

Cheers!
-brian

Designing house music – Qlab, CD, iTunes, or Spotify?

TL;DR:
Putting together house music, with the case made that you use Qlab for its level of control.

The Story:
When designing sound for a show. house music is much more than just an afterthought, whereby you just put on some random music and hit play. Properly done, house music – preshow, intermission, and postshow – helps set the environment for the audience, keeps them in the world, and can even further the rest of the design.

Many early-career designers might not think about putting this music into Qlab with the rest of their show. Our music consumption habits have changed a lot in the past few years, and people may be getting out of the habit of listening to music in something like iTunes, instead using services like Spotify, etc. But there are still many times where a designer is presented with a CD from the director, or an iTunes playlist on a laptop, or even a Spotify playlist – all of which can conflict with standard show design.

Here is how I prefer to handle house music – to no one’s surprise, I insist on Qlab. All of the following starting scenarios will end up using Qlab as a playback solution.

NOTE: This post is about the technical process of playing back music, and does not discuss the licensing involved when using playback music in a public space. That’s for another post.

The Esoteric Bit:
iTunes– I began my career using iTunes playlists, because it was quick and easy, and I have a massive song library. I wrote an Applescript to control the iTunes playback, so it could be synced with the rest of my show and I wouldn’t have to flip back and forth between applications. (I will share this script in a future post and update this one.)

Most of my library(ies)…with 40,000+ songs, of course I’m going to pull from local copies when I can!

I quickly moved to using Qlab (and seperate Cue Lists, as described in the post https://www.rocktzar.com/qlab-organization-multiple-cue-lists-and-house-music/). Why?

  • Fewer applications running and less system overhead
  • More control over the music – song levels, start/end times, looping playback
  • Smoother fade out control than my iTunes scripting solution
  • One Go button

The granular level of control is really key. As discussed in the post about licenses (https://www.rocktzar.com/qlab-licensing-costs-means/), you can use Qlab with a Free or Pro Audio license. Which license you have determines what control you have:

  • Free– volume only
  • Pro Audio– effects can be applied to individual songs; also allows scripting

Recorded music has such a wide variance of levels and tone. Therefore, in a theatrical production, I want to sculpt this music into something consistent, as though it were all coming from the same album. I will adjust the levels for each song using the “Trim” tab in Qlab, and then add an EQ on a song-by-song level, as needed.

House music for Cabaret, with effects applied to a single track
In the example shown for Cabaret, I used old cylinder recordings that had been digitized. (They were provided by the amazing project found at http://cylinders.library.ucsb.edu) Technically, these recordings were from before the time of the show, and being an extremely delicate form of media, the world had moved on to records. However, the songs I selected were from the general geographical area, and the songs themselves were probably still in high rotation in 1931 Berlin. The sound quality of the recordings really was transportive, and set the scene very well. But, as you can see in the highlighted example, some of these recordings were in rough shape, and needed some EQing. This is an extreme example, but nonetheless, my point is made.

I HAVE needed to duplicate this behavior in iTunes – “Get Info” on a track and select the options tab.

iTunes track options

You have some control on the start/end times, volume, and some pre-set EQ options. I did this on one show because it was a night of one-acts, and everyone was using iTunes and insisted on it…but it’s annoying.

Instead, copy all of those song files and put them in your show’s directory, and use Qlab. (For best results, change the format to Wav or Aiff – you can’t really upsample the file, but you can make it uncompressed, and therefore have an optimal playback format. This way, the computer doesn’t have to decompress the file being played.)

CD – Similar to what I have discussed about iTunes, I want the control over the songs, especially if it is a mix CD that someone hands me. Plus, I don’t want more than one button on and fader for my operator, going between the show computer and a CD player. Rip that CD to Wav and use Qlab!

Please don’t make me use one of these in 2018…

(Because I am a nerd, if I ever have to use a CD player, it will hopefully be one with a data connection so I can control it remotely…my fellow engineer Joe Boerst had a couple with serial ports the last gig we did together, but sadly I was unable to complete the challenge in time!)

Old serial port. In theory, with patience, I could get Qlab talking to this…

Spotify– Here is where modern methods collide with best practices. Directors definitely come up to the sound designer with “hey, I made a playlist for the show, you can just use that!” I don’t want to stream media from the internet in a show – I want it local so that I know that there will be no problems. I will try to get copies of the music and use that instead.

Spotify Playlist

For the cases where that is not possible or there is no time, I re-wrote my Applescript mentioned above, adjusting it to control Spotify. I will share this script in the near future and update this post. However, you will need a Pro Audio license (purchased or rented) to run scripts, and of course, you can’t tweak each song for levels and EQ. (There is, however, a “Normalize” feature.)

iPhone/iPod/Youtube– Oh my…the shows with last minute students or choreographers who say “here is my iPod, the music is all on there,” or “Can you play this Youtube video start it at this time and then end it when it gets to this part ok byebye!”

What it can be like working a last minute student dance production…

At this point, no amount of Qlab jujitsu is going to help you. This is a lousy gig. Hopefully you are getting paid decently, and there is catering you can grab as you run out the door.

If you are stuck with a phone, hopefully you have a “Do Not Disturb” function that will block calls and text messages, since “Airplane Mode” might knock you out of functionality. Better off finding the clips using the show computer!

One of my enterprising students, Chris Varanko, survived a gig where he was handed an iPod with a broken headphone jack by an overbearing choreographer. He plugged the offending device into the show computer, loaded iTunes, and controlled the playback from there. (YMMV, and iPods/iPhones can be stuck in either Mac or PC sync format.) He got it working…but I don’t think the poor guy got any catering.

Cheers!
-brian