Slice and Dice in Qlab!
TL;DR:
Remix your audio files on the fly in Qlab, building loops and vamps.
The Story:
This is a topic that I was discussing with my friend Matt the other day. Everyone who has used Qlab has used it to play back sound files. Its quick and easy to get comfortable, and trim files to get tight starts and ends, etc. Or maybe, like me, they have a favorite phone ring wav file with multiple kinds of rings on it, and trim it to the particular ring that is needed.
Beyond this, the “Time and Loops” tab of audio cues also allows you to do some basic re-arranging of the sound. Depending on your needs, it can save you from sending the audio out to a DAW to create a new edit to be brought back into Qlab.
The Esoteric Bit:
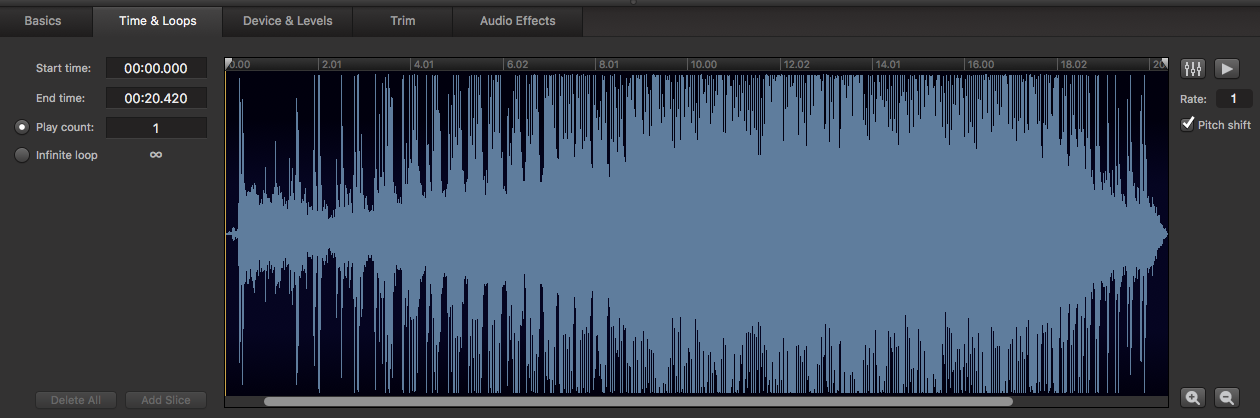
Here is a quick primer on how to use the Slice feature on this tab. In my example, I’m setting up the sound of an old car starting up it’s engine. First you hear the click of the ignition, then a couple of whirs as the key is turned, and then the sound of the engine fighting to turn over.
What if that sound of the key turning needs to be longer? Maybe the actor is hamming it up turning the key, and needs a little more time. Well, we could bring that sound file into a DAW like Protools or Logic or Reaper, slice up the file, duplicate the part and rearrange the edits, then bounce back down to a new wav file, and put the new file into Qlab. But that’s more work than I want to do in this instance. I will create what are called slices.
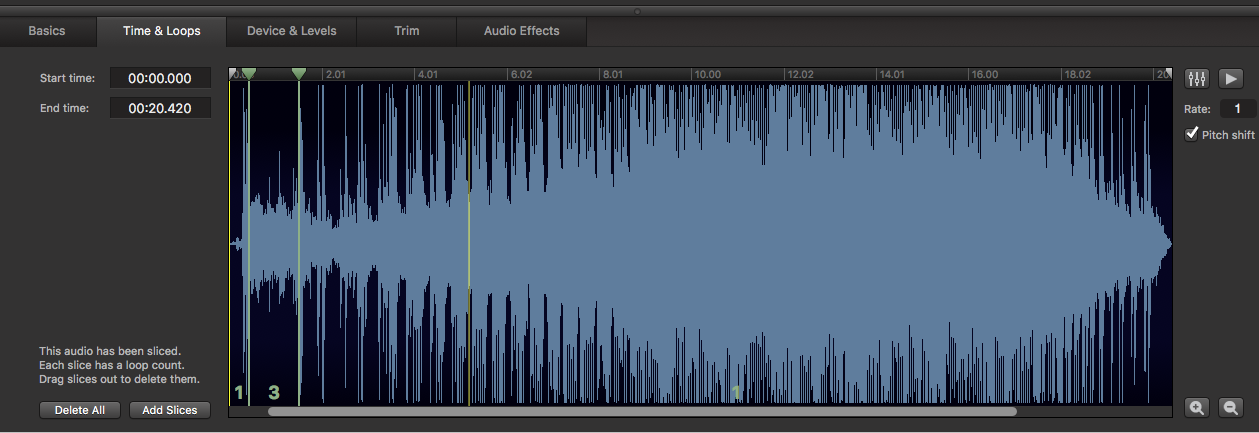
Click in the timeline, and click the Add Slices where you want to create an edit. Here, I created slices at the beginning and end of the segment I wanted to repeat – the key being turned. (You can also drag and highlight a single section, click Add Slices, and two edit points will appear.) You can, of course, drag the slices around and reposition them as needed.
In each created slice, you will see a number in the bottom middle of the slice. This is the number of times the slice will repeat. Note that you can not skip areas – this is strictly linear slicing and looping. In fact, if you put the number “0” in one of these slices, you actually get an infinity symbol – meaning the slice will loop until you tell it to do something.
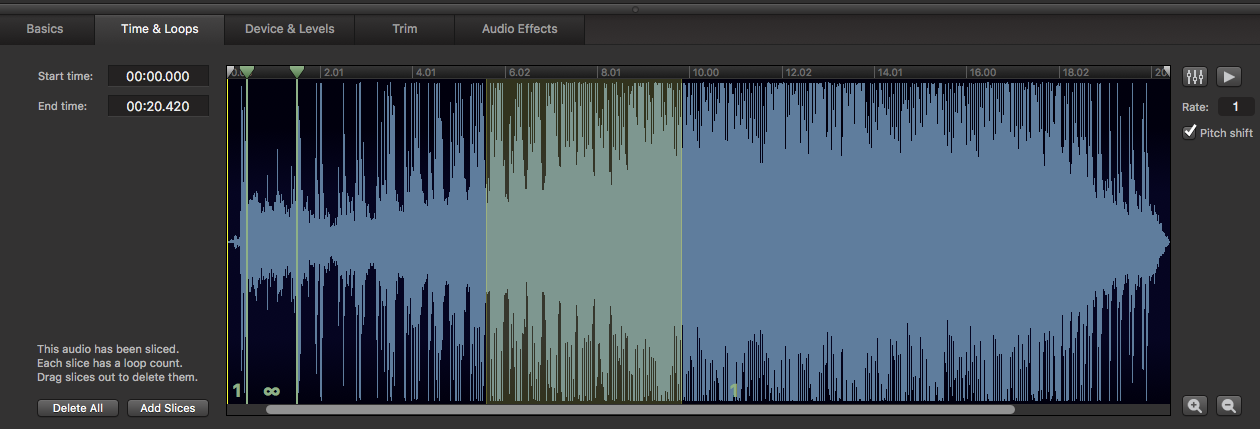
Let’s say the scene is a comedy, and the actor is REALLY hamming it up as they turn the key, and they need to be able to milk the laughs before moving on. In this case, we’d use this infinity slice, and use a Devamp cue.

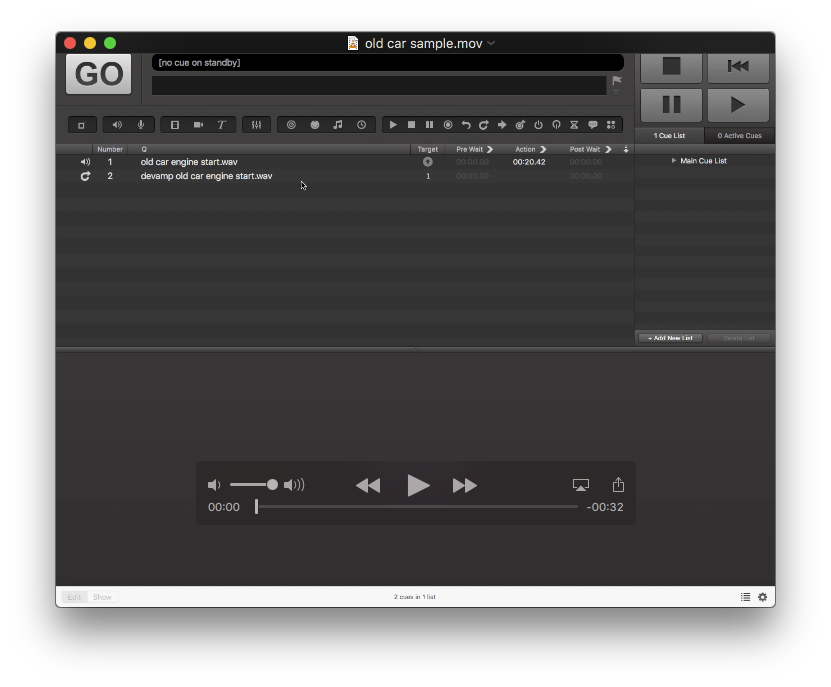
Devamping means that the loop will stop at the end of the region that has been set to loop, instead of just cutting out immediately. Makes a lot more sense. If this were a musical cue, this would allow us to end the musical phrase before moving on. In this example, Cue 1 plays the begining of the wav file, and loops the sound of the key turning, and Cue 2 devamps that loop and continues on to the rest of the file in Cue 1. Here’s a video with it in action:
It doesn’t completely replace your need for editing sound effects in a DAW, but it certainly helps to be able to do quick and easy things. More importantly, it allows you to be able to create a dynamic cue that can work with the performance, in real time, and react to it.
Cheers!
-brian
Tags: audio, live production, production, programming, qlab, sound design, sound engineer, theatre, tutorial