Get more out of ancient ETC Express lighting boards, using Qlab and MIDI
TL;DR:
Use that ancient lighting console in new and exciting ways, by integrating your lighting cues with the rest of your show in Qlab! You can trigger Cues and Macros!
The Story:
The first big Qlab design I ever did was a show requiring me to design and run lights, sound, and video, in a theatre I had never been to before. No big, right?
The theatre in question had a venerable ETC Express 24/48, and thanks to a MIDI adapter, I started using the trick I have used ever since, which is to have Qlab trigger my cues. So lighting was able to fall in line with all of my other cues.
Other than working in tiny theatres where someone has too many jobs, why is this useful? Here are some examples I’ve done:
- Dancing at Lughnasa– having the radio power on, complete with light, and have music start playing from that radio, in the proper operating order (power, light warms up, sound fades in).
- The Laramie Project – syncing camera sounds with flashing strobe lights
- Rumors – crossfading music at the top of the show – from the front of house speakers to the living room stereo on stage, while also activating the power on the stereo practical during the cue (and thereby removing the practical’s power lights from the previous black out cue)
- Concerts – slaving video and lighting cues together
Using MIDI (or more properly, MSC – MIDI Show Control) you can trigger both Cues and Macros on an ETC lighting console. In a later post, I will bring this process up to the modern era, and show how to do this with an ETC Ion lighting board. But, considering how many old Express boards are still out there, this is continually a useful topic. I myself will probably need to do this in the coming months, and use this page for my own references!
The Esoteric Bit:
This works with all ETC boards that use the old “console software” operating system. This includes the following:
- Express 24/48
- Express 48/96
- Express 72/144
- Insight
- Insight 2
- Insight 3
- Expression
- Expression 2
- Emphasis Server
- and many more. Again, I will post later about the ETC Ion and other more modern boards.
You will need your computer, the lighting board, and a MIDI>USB adapter. I am a big fan of the M-Audio Uno, because it’s cheap and works perfectly in a variety of scenarios. (Connecting it can be a little weird, as the plugs are labeled in a way that seems backwards to some people. Just note that the MIDI plugs are labeled “To MIDI In” and “To MIDI Out” and you’ll be golden.)
Install the drivers for your MIDI device, restarting if need be. Fire up Qlab, and go to the preferences for MIDI Controls. Make sure “Use MIDI Show Control” is selected. The Device ID is the ID for your computer in this MIDI network.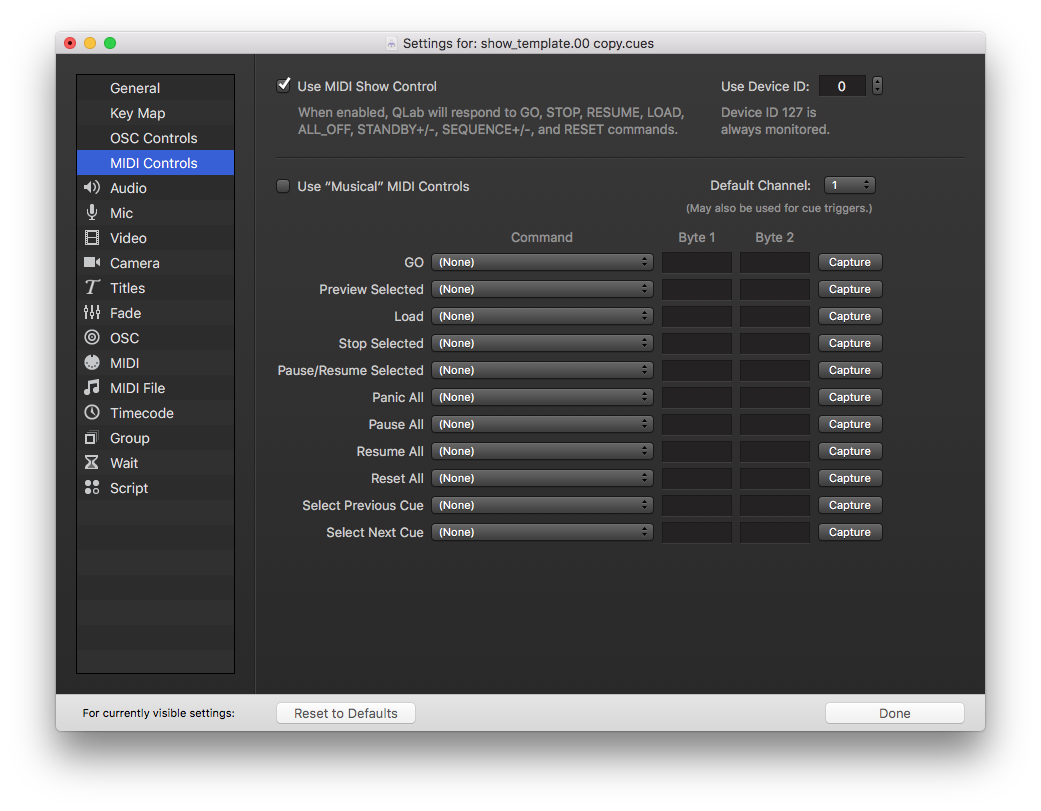
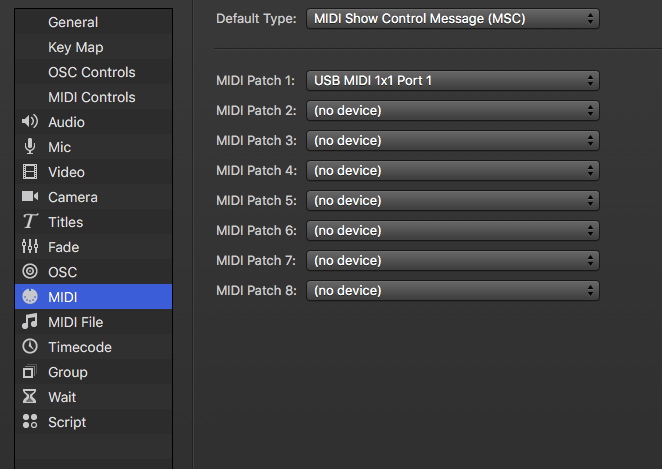
Next go to the MIDI preferences. In the dropdown for the “MIDI Patch” of your choice, you should be able to select your interface. (If it doesn’t appear, consult the manual.) I would also use this opportunity to make the default type of MIDI command “MSC,” since I’ll be creating a lot of MSC cues.
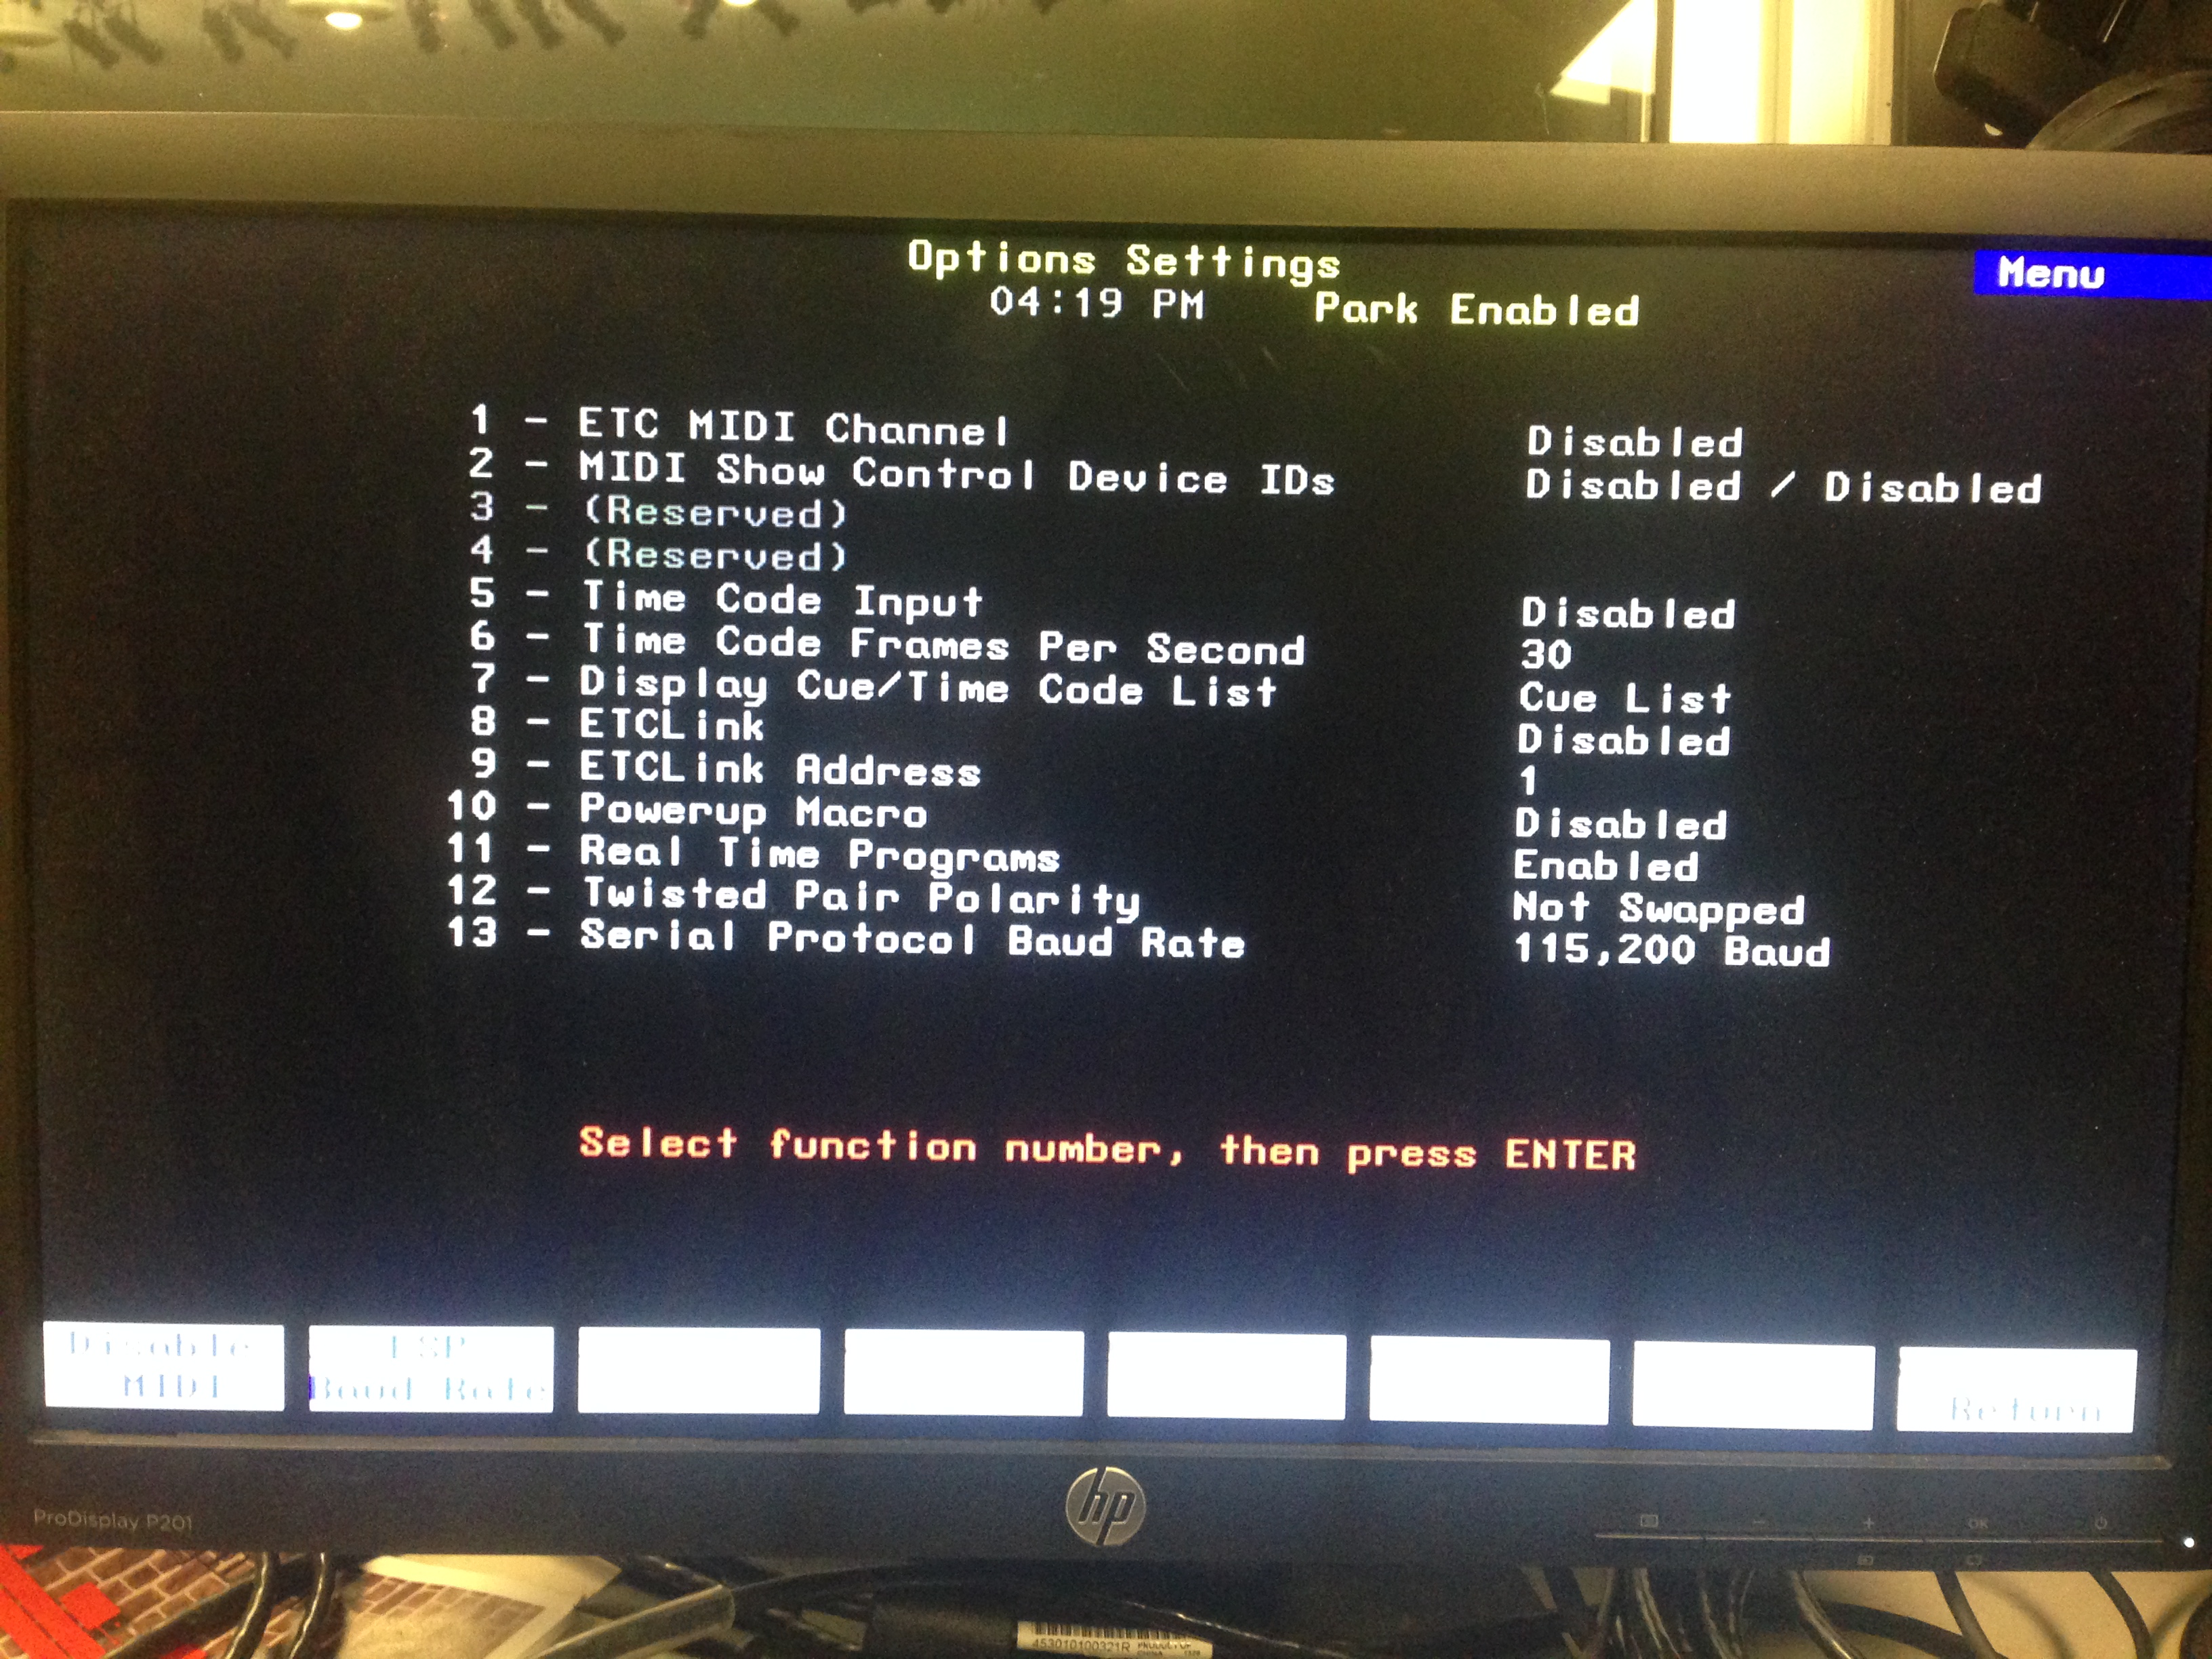
Now, let’s set up the board (keystrokes are for the Express, but should translate easily to other ETC boards). Plug in the MIDI device to the back of the board. (Sometimes, if I am only wanting to control in one direction, or to troubleshoot, I will plug in only the “In” or the “Out” respectively.) Then, hit “Setup” and then select “6” for Options Settings. It looks like this:
If you already are familiar with MIDI, you can probably take it from here. But here’s a quick setup to get up and running.
Type “1” to edit the ETC MIDI Channel, and set that to 1. Then, type “2” to edit the MIDI Show Control Device IDs. This part I am always forgetting what is what. Basically you are setting up the MIDI channel (or address, in lighting parlance) for the lighting board and telling it what channel/device will be telling it commands:
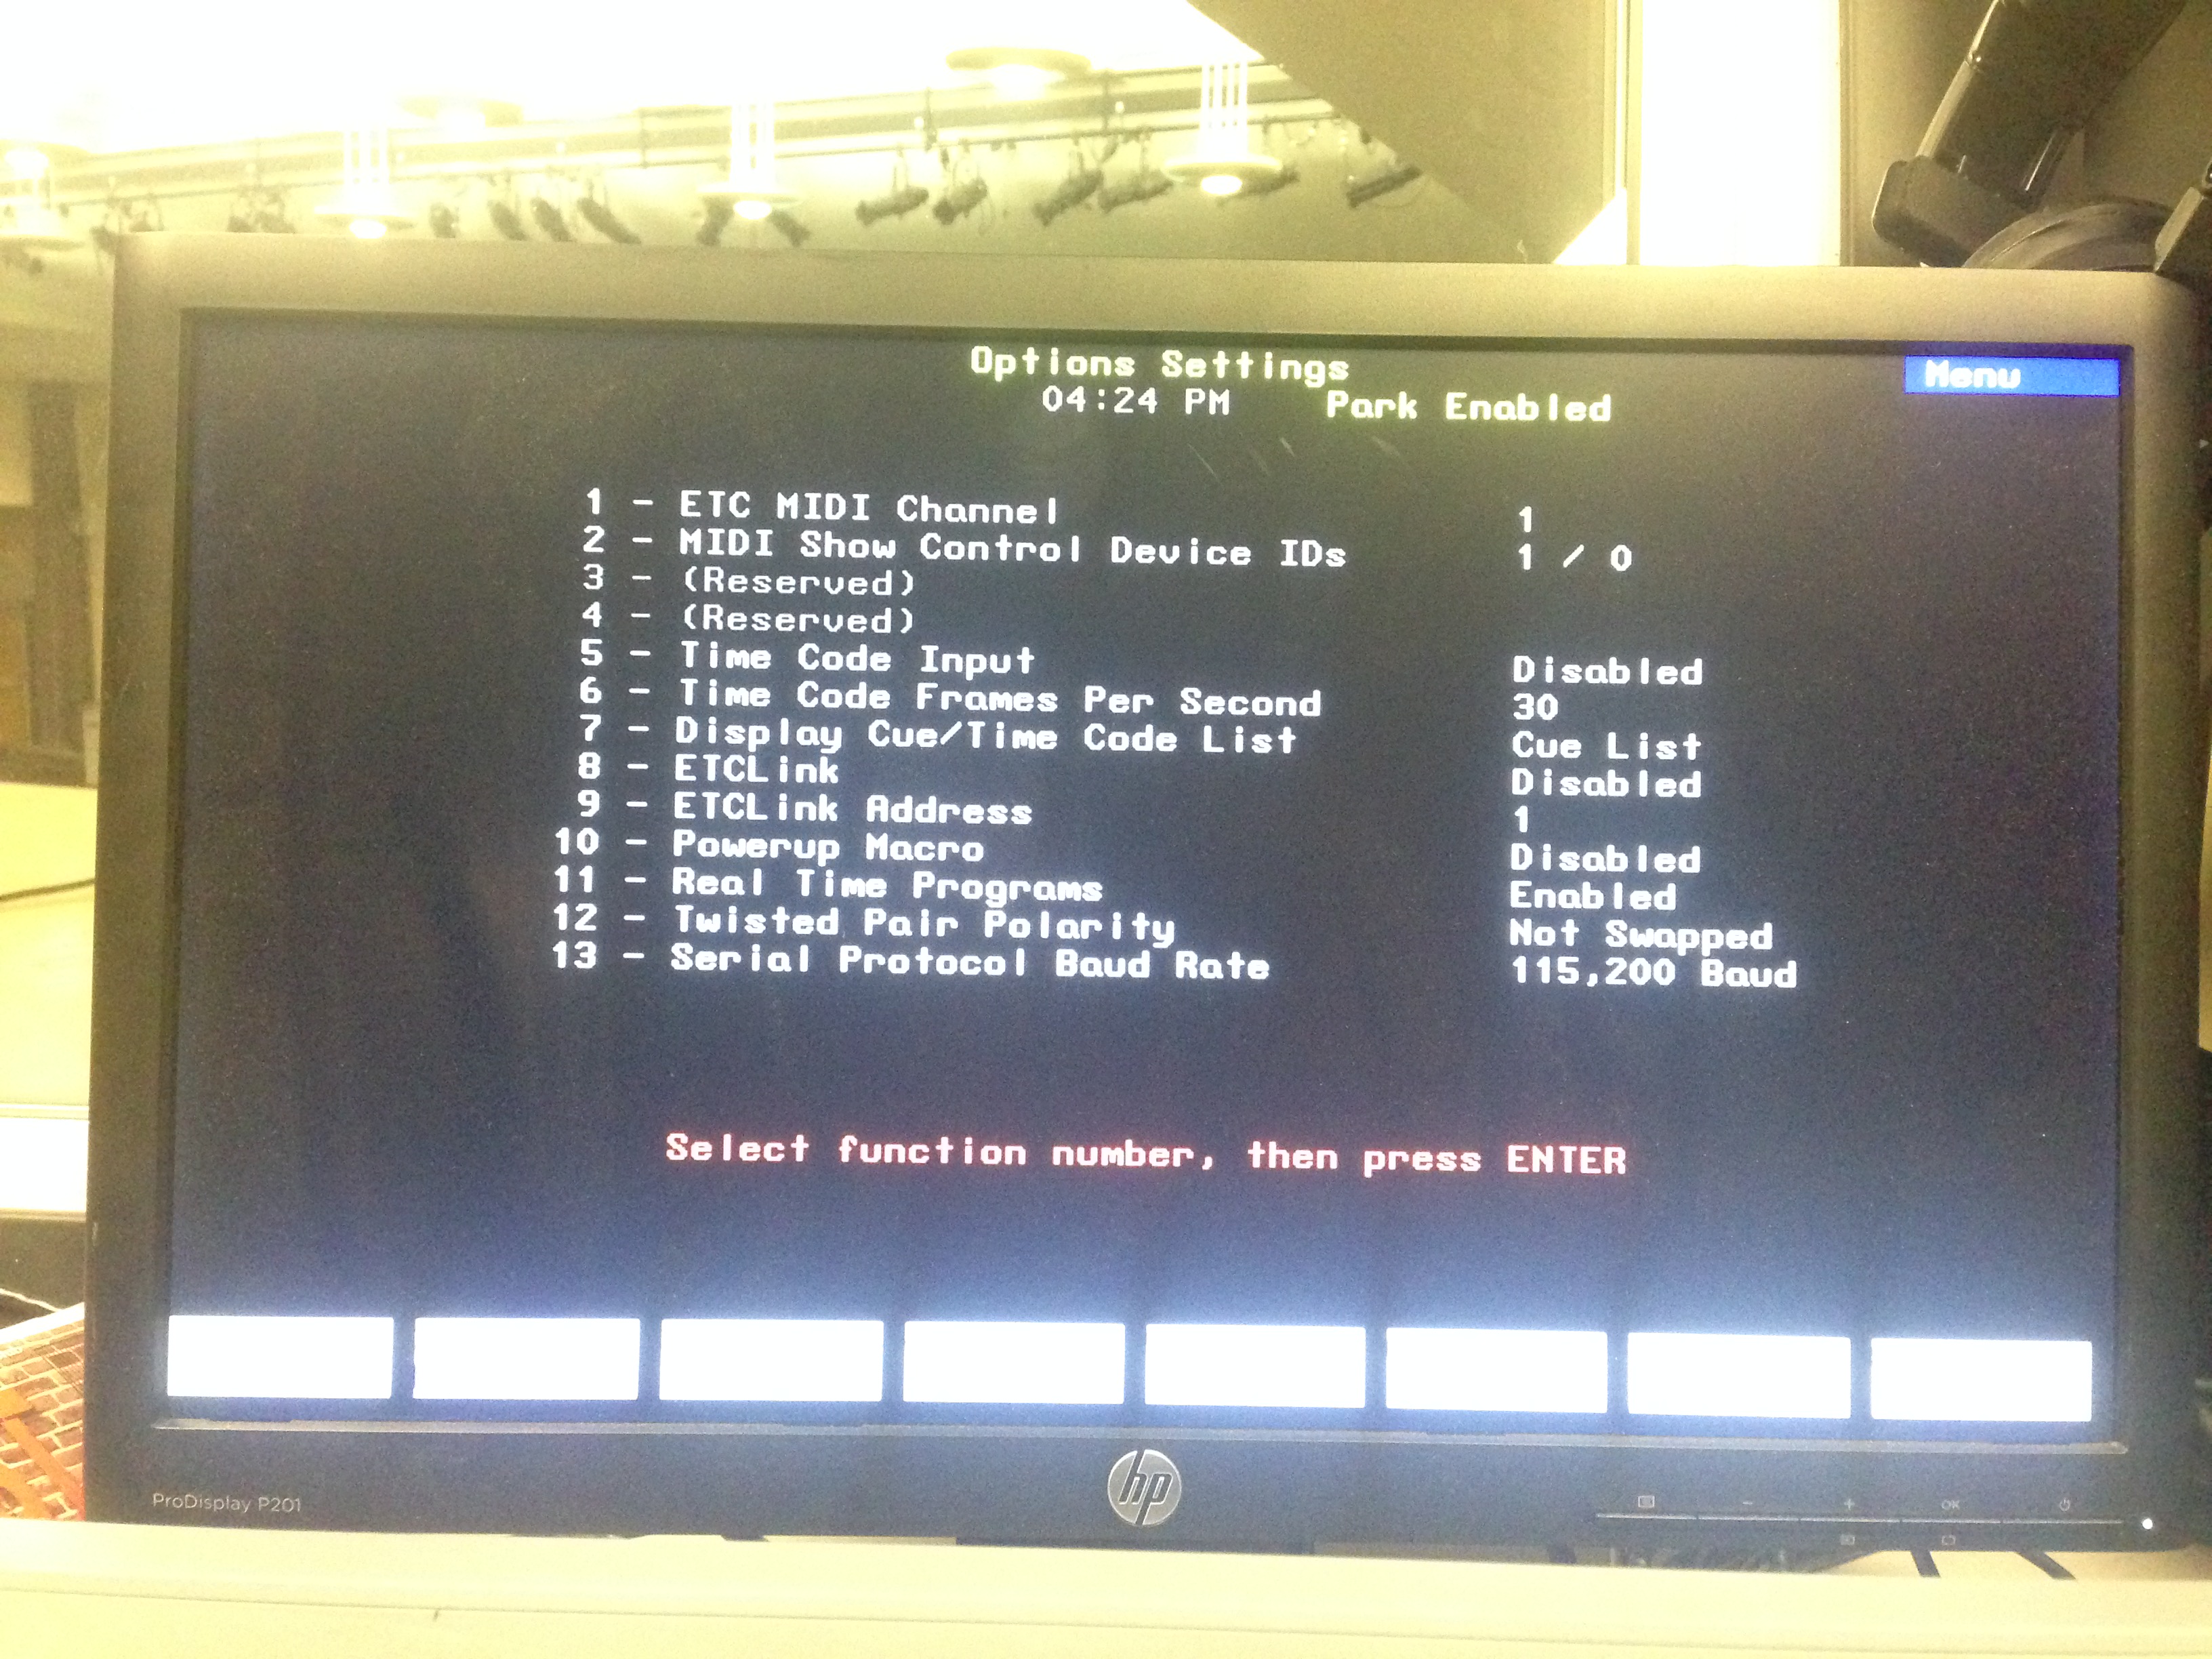
I’ve addressed these as 1 and 0, respectively. Board is 1, my laptop/Qlab is 0 (yes, 0 is a number).
(One thing to understand is that the numbers I have chosen are arbitrary. MIDI has 16 available channels. So you can use any combination of numbers you want. Just match them appropriately.)
Now, how do we trigger?
Back to Qlab. Set up an MIDI cue, and click on the Settings tab. You will see the MIDI Destination already populated with your device, if you used Patch #1, and Message Type will display our default, which we also set up above.
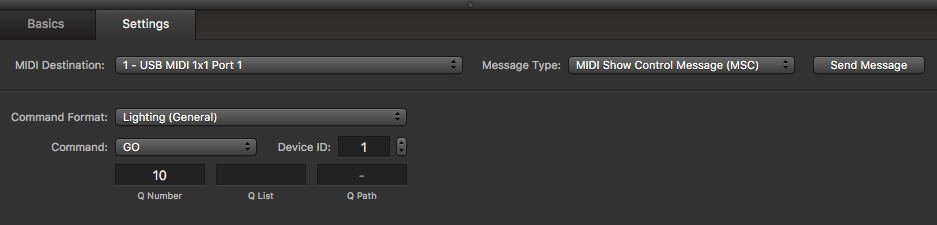
For our purposes, we will need to set up the Command Type as “Lighting (General),” and the Device ID to the number we set above on the Express. In this example, make it “1.”
To control the Express, we have two types of Commands that we can send.
- The default, “GO,” sends a GO command to the cue that you specify in the “Q Number” field. (We will ignore “Q List” and “Q Path” in this Express example.)
- The “FIRE” command will fire any macro number that is programmed on the Express.
Now you can add lighting (or power) cues anywhere in your Qlab show.
If you don’t put a cue number in the “Q Number” field, the board will receive that command and just tell whatever cue is next to “GO.” Maybe that’s a feature, maybe it’s a trap – all depends on how you decide to program your show.
Conversely, you can run your Qlab rig from the lighting board. All you have to do is number a cue in Qlab that matches the number on the lighting board that you want to sync with. The nice thing, if you decide to go that route, is that Cue numbers in Qlab are unique across the entire workspace. So it doesn’t matter what Cue List you have up front – Cue 20 on the Express will fire Cue 20 in Qlab, no matter what Cue List it lives in.
I will write another post about controlling the ETC Ion and Ion XE when school starts up again and I’m at the board. I’m also going to give you some more ideas on how to use this newfound power you now have.
Cheers!
-brian
Tags: lighting, lighting design, live production, MIDI, MSC, production, programming, qlab, stage, theatre, tutorial